
Page 23 - ABF Newsletter June 2025
P. 23
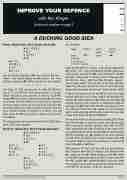
   IMPROVE YOUR DEFENCE
with Ron Klinger
Solution to problem on page 2
Teams. Dealer East. North-South vulnerable.
] Q J 10 8 6 2 [Q6 }Q752
{ 10
] K75
[ K1042 N } J8 WSE { KJ74
You are West, defending 4]. You lead the ]5: two - three - nine. South cashes the ]A: seven - six - four. Declarer plays the {5. What would you do as West?
*****
You have 11 HCP, dummy has 7, total 18. Declarer has 15-17, total 33-35. That gives partner 5-7 points. Given declarer’s play, partner is sure to have {A, maybe {A-Q. It looks automatic to play {J, but there is no need for that. What you really want is partner on lead to play a heart, so that you can score the [K. Recommended play: Play low and let partner win the trick. Partner figures to switch to a heart. You will then make the [K and collect a diamond trick later if available.
The deal arose in the quarter-finals of the 2024 Spin- gold (USA Open Teams):
Board 21. Dealer East. North-South vulnerable.
] Q J 10 8 6 2 [Q6 }Q752
{ 10
]K75 ]43 [ K 10 4 2 [975 }J8 }A6
At one table:
WEST NORTH EAST
pass 1NT 1
pass 4[ 2 pass all pass
1. 15-17 points.
2. Transfer to spades.
West led the ]5: two - three - nine. South cashed the ]A: seven - six - four, followed by the {5. West won with the {J, cashed the ]K and exited with the {4. Declarer ruffed this in dummy and continued with the }2: six - king - eight and the }3: jack - queen - ace. A heart switch now by East is too late. Declarer takes the [A and cashes the rest of the diamonds, discarding dummy’s heart loser, North-South +620.
If West had played low on the {5 at trick three, East would have won, and a heart switch would have de- feated 4[. After taking the {J, West can still beat 4] double dummy with a switch to diamonds (without cashing the ]K). East takes the }A and plays a heart. The [K will then beat 4]. However, the diamond switch after winning with the {J could look very silly if East held }K6 and South }A10943.
At the other table, South opened a strong 1NT, North bid 2[ (transfer to spades), South bid 2], all pass. Note that both Souths opened 1NT with 14 HCP. Both upgraded the hand because of the good five- card diamond suit. Even though 4] can be defeated, North’s heading for 4] appeals more than settling for 2]. After all, North has a seven-loser hand and the heart finesse might have worked, or East could have held ]Kx or ]K bare.
West led the }J. East took the }A and returned the }6. Declarer won this in dummy and finessed the ]9, losing to the ]K. West shifted to the {4, taken by the {A. East switched to the [7. South rose with the [A, cashed ]A, ruffed the {Q in dummy, drew the missing trump and ran diamonds, ditching dum- my’s [Q for ten tricks, +170, but -10 imps.
{KJ74
]A9 [AJ83
} K 10 9 4 3 {Q5
{A98632
A DUCKING GOOD IDEA
SOUTH 4]
 Australian Bridge Federation Ltd. Newsletter: June 2025
Page: 23
