
Page 13 - ABF Newsletter October 2024
P. 13
A lot of the field found this hand too challenging to bid to slam, on the following hand/auction:
]A6 ]2
[ A Q J 10 7 3 [ K 4 2
}4 }AQ7532 {7432 {AK5
WEST NORTH EAST SOUTH pass
1[ 1] 3} 4] pass pass ?
What would you bid now (vulnerable against not)? These decisions, which seem like wild bashes, are all based on visualising what partner’s hand can be. If they didn’t have the ]A, then they probably held the }K, so 6[ looked like a ‘winning bid’ – another prac- tical bid. (Two pairs managed to bid 7[ but, perhaps, South didn’t raise to 4] on his almost-yarborough, removing plenty of bidding space.)
Whilst we were successful with that slam, look at this
North led the {2, fourth-highest. He ducked South’s {10, winning the {J in dummy. Now he led a heart towards his Jack, hoping to generate four heart tricks, since he only had eight top winners. North won the [Q, and continued clubs. Declarer now continued with his plan to work on hearts. He cashed the [A and [K, then gave South their fourth heart – hearts having broken 4-2. Down two, since we now had two clubs, two hearts and two diamonds.
What should he have done? He should have double- checked his plan, since it was flawed. There was a much better line, especially since the {2 suggested that clubs were 4-3. He should have looked at the di- amond suit. His J-10-9 could be made into winners. Win the club, lead the }K, losing to the ace. Cross to hand (club or spade), and continue with the }J. The defence now have two clubs and two diamonds, but declarer has the rest.
Keep checking your plans for flaws or faults. Keep working on planning at trick one.
My final hand was amusing rather than anything: ]A975432
[542 }K {AJ
] Q J 10
[— }AJ92
{ 10 8 7 4 3 2
WEST NORTH EAST SOUTH pass
1[ 3]* 4[ 5] pass pass dbl all pass
* I decided to make a weak jump on a stronger hand because I had a weak suit and partner had passed.
Before he led, East asked about South’s bid. I sug- gested it was a ‘sucker bid’ to make him double.
Partner was looking a little bewildered, so I point- ed out the jump to the five-level. It usually indicates extreme length in our suit; of course, partner simply didn’t notice the availability of the 4] bid – so it was, in fact, the sucker bid!
East led a heart, ruffed in dummy. }K, heart ruff, }A, throwing the {J, club to the ace, and another heart ruff. I ruffed a diamond to hand and cashed the ]A, dropping West’s singleton king, for 13 tricks. The only lead to stop 13 tricks was a trump, yet there was only one score of 850 (two overtricks) amongst the various 5] doubled contracts.
Of course, you know I like to use dummy’s trumps, hence the result.
hand:
]764
[6 }AKQJ983 {Q8
] A K 10 9 8 [AQ5 }— {KJ743
WEST NORTH EAST
pass 2} game force pass
pass ?
SOUTH 1]
3{ extras
As with most of the field, I now bid 3], to set spades. After some cue bids, I bid 4NT (North) and found that we were missing one key card and the ]Q. What now? Given partner’s extra values, I pictured the ability to discard my spade loser(s) on clubs (or hearts) and tried 6}. This failed when partner – nat- urally – bid 6]. I didn’t think 6NT was a good idea, because we may not have had an entry to my hand. (Yes, some people failed in 3NT!)
How should I have bid it? Over 3{, I should have bid 4}, showing a solid diamond suit and setting the suit as trumps. Then we could have played in 6}. Think about these opportunities.
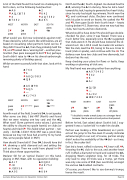
Declarer fell for an ‘optical illusion’ on this hand, playing in 3NT, West, with no opposition bidding:
]AJ7 ]KQ84 [J8 [AK752 } J 10 9 5 4 } K {A95 {K64
Australian Bridge Federation Ltd. Newsletter: October 2024
Page: 13
